Blog
Connecting Servlet with MySQL Database using JNDI DataSource Connection Pool
- March 6, 2022
- Posted by: jcodebook
- Category: Servlet Tutorials
In this blog, you will learn How to configure JNDI DataSource for Database Connection Pooling in Tomcat. Here, you will learn how to configure your java dynamic web project to access the JNDI Data Source.
Prerequisite:
- Eclipse IDE with Tomcat Configuration
- MySQL Database
Here are the steps to configure JNDI DataSource.
Step-1: Create a Database Schema and a Data Table
Open MySql Workbench and write the following Queries to create a database and data table.
create database skillplusplus;
use skillplusplus;
create table User(Name varchar(500), Email varchar(500));
insert into User values('James', 'james@gmail.com');
insert into User values('Amit', 'amit@gmail.com');
Step-2: Download and Configure MySQL Connector
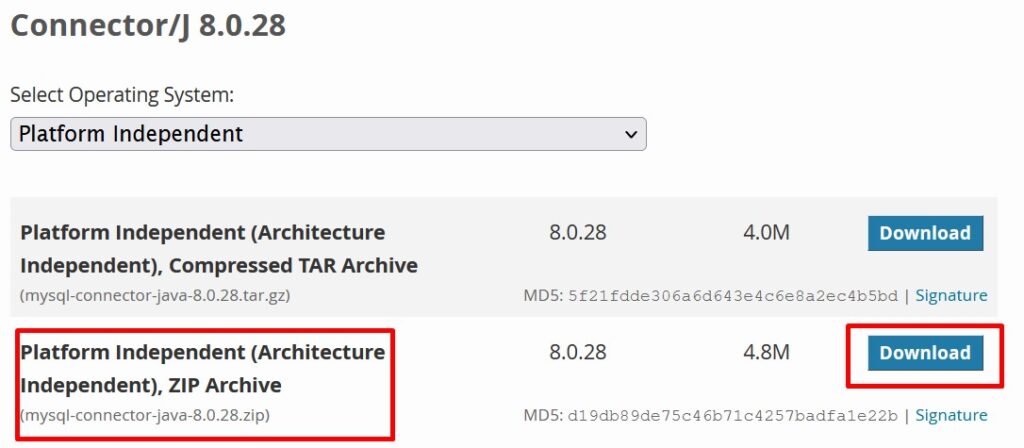
Use the link https://downloads.mysql.com/archives/c-j/ to download the MySQL Java connector.

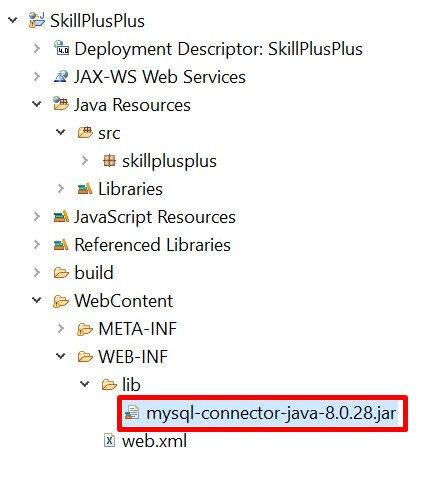
Extract the mysql-connector-java-8.0.28.zip file and copy the mysql-connector-java-8.0.28.jar and paste it into the following project folder as shown in the Figure below.
For example, your web project name is ‘SkillPlusPlus’.
SkillPlusPlus ->WebContent ->WEB-INF ->lib

After this, add mysql-connector in the project build path as shown in the figure below.

Now, All set.
Step-3: Configure JNDI Context File in your Web Application
To declare a JNDI DataSource for the MySQL database above, create a Resource XML element with the following content.
Let’s create a context.xml file inside /META-INF directory of a web application.
context.xml
<Context>
<Resource name="jdbc/myproject"
       auth="Container" type="javax.sql.DataSource"
      	maxActive="100" maxIdle="30" maxWait="10000"
      	username="root" password="root"
        driverClassName="com.mysql.jdbc.Driver"
      	url="jdbc:mysql://127.0.0.1:3306/skillplusplus"/>
</Context>
name: Name of the resource.
auth: Specify authentication mechanism for the application code, can be Application or Container.
type: The fully qualified Java class name expected by the web application when it performs a lookup for this resource.
maxActive: Maximum number of database connections in pool. Make sure you configure your max_connections large enough to handle all of your DB connections. Set to -1 for no limit.
maxIdle: Maximum number of idle database connections to retain in pool. Set to -1 for no limit.
maxWait: Maximum time to wait for a database connection to become available in ms, in this example 10 seconds. An Exception is thrown if this timeout is exceeded. Set to -1 to wait indefinitely.
username and password: MySQL username and password for database connections.
driverClassName: Class name for the JDBC driver. Class name for the official MySQL Connector/c-J driver is com.mysql.cj.jdbc.Driver.
url: The JDBC connection URL for connecting to your MySQL database.
What is JNDI?
Java Naming and Directory Interface
The Java Naming and Directory Interface (JNDI) is an application programming interface (API) that provides naming and directory functionality to applications written using the Java programming language.
It is defined to be independent of any specific directory service implementation. Thus a variety of directories -new, emerging, and already deployed can be accessed commonly.
A connection pool improves performance and scalability by allowing multiple clients to share a small number of physical connections. You set up the connection pool in your application server and access it through Java Naming and Directory Interface (JNDI).
Step-4: Create Servlet Class
ServletJNDIDemo.java
package skillplusplus;

import java.io.IOException;
import java.io.PrintWriter;
import java.sql.Connection;
import java.sql.DriverManager;
import java.sql.ResultSet;
import java.sql.Statement;

import javax.annotation.Resource;
import javax.servlet.ServletException;
import javax.servlet.annotation.WebServlet;
import javax.servlet.http.HttpServlet;
import javax.servlet.http.HttpServletRequest;
import javax.servlet.http.HttpServletResponse;
import javax.sql.DataSource;

@WebServlet("/ServletJNDIDemo")
public class ServletJNDIDemo extends HttpServlet {
	private static final long serialVersionUID = 1L;
	@Resource(name="jdbc/myproject") //load resource file- context.xml
	private DataSource datasource;	//Creating DataSource object

	protected void doGet(HttpServletRequest request, HttpServletResponse response)
			throws ServletException, IOException {
		response.setContentType("text/html");
        PrintWriter pw=response.getWriter();
        //initializing connections
        Connection con=null;
        Statement stmt=null;
        ResultSet rs=null;
        try {
        	con=datasource.getConnection();
            stmt = con.createStatement();
            rs = stmt.executeQuery("select * from User");
            while(rs.next()) {
                pw.print("<br>"+rs.getString("Name")+", "+rs.getString("Email"));
            }
        }// End of try block
        catch(Exception e) {e.printStackTrace();}
	}
}
Run the ServletJNDIDemo.java file and the following output will be displayed.

All the very best. Happy Learning!!!
