Blog
Creating First Servlet Project in Eclipse IDE- A Step by Step Guide
- February 12, 2022
- Posted by: jcodebook
- Category: Servlet Tutorials
This tutorial guides you through the step-by-step process of creating your first servlet project in Eclipse IDE.
Prerequisites: You need to install the following software to write your first servlet project.
- Eclipse IDE with JRE/JDK Installed
- Apache Tomcat Server
- Configuration of Apache Tomcat in Eclipse IDE.
Go to this link How to install Eclipse IDE and Configure Apache Tomcat Server if you have not installed Eclipse IDE or not configure Apache Tomcat in Eclipse IDE.
Step-1: Create First Servlet Project
Create a Dynamic Web Project by selecting the File -> New -> Dynamic Web Project as shown in Figure below.
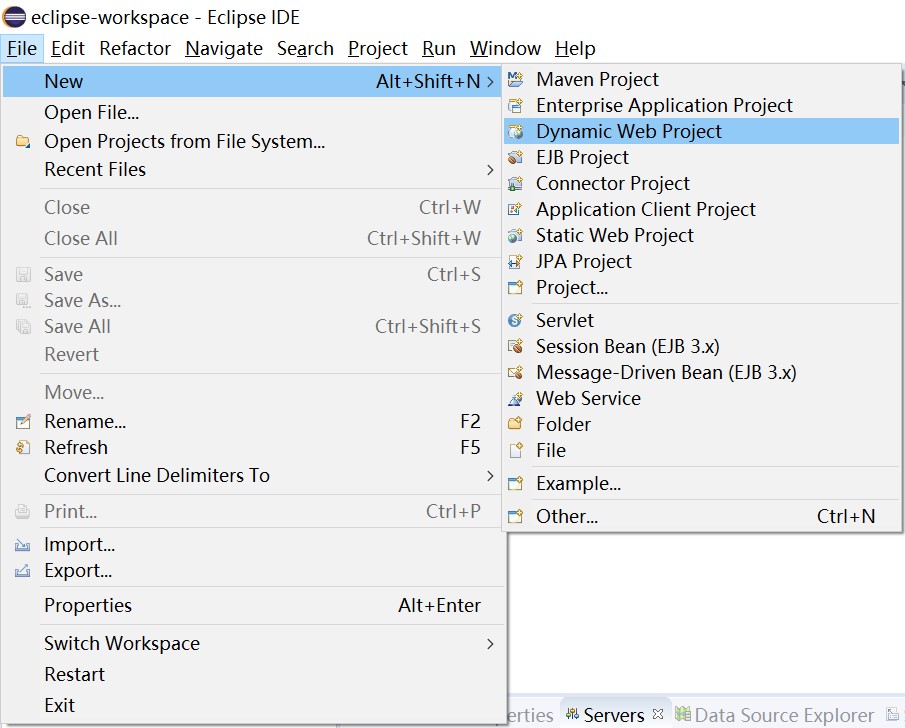
Watch the following video if Dynamic Web Project is missing in Eclipse IDE.
After selecting Dynamic Web Project, a new window will open. Write any project name, for example, I am using SkillSharing as a project name as shown in the figure below.
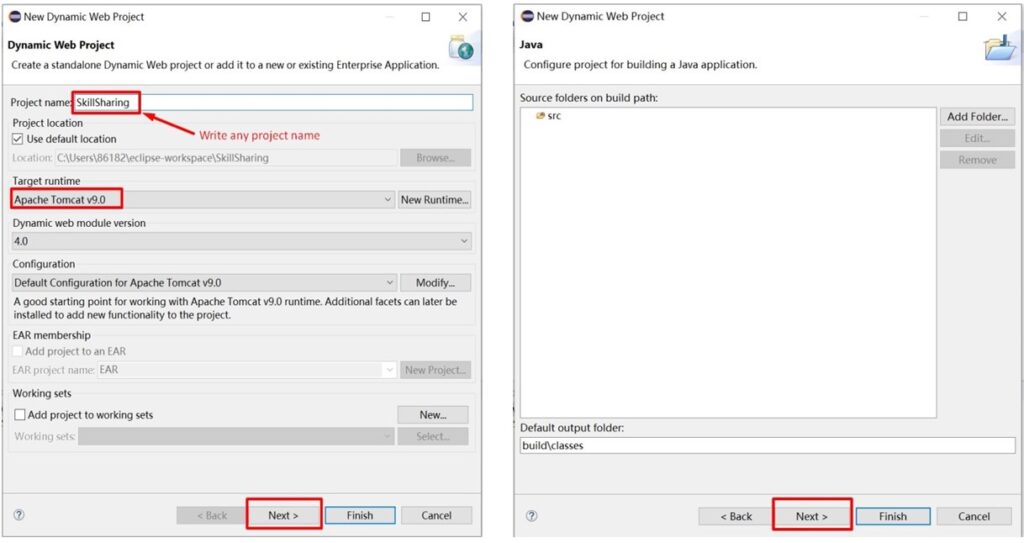
Click on Next and Next, and tick Generate web.xml deployment descriptor, as shown in Figure below.
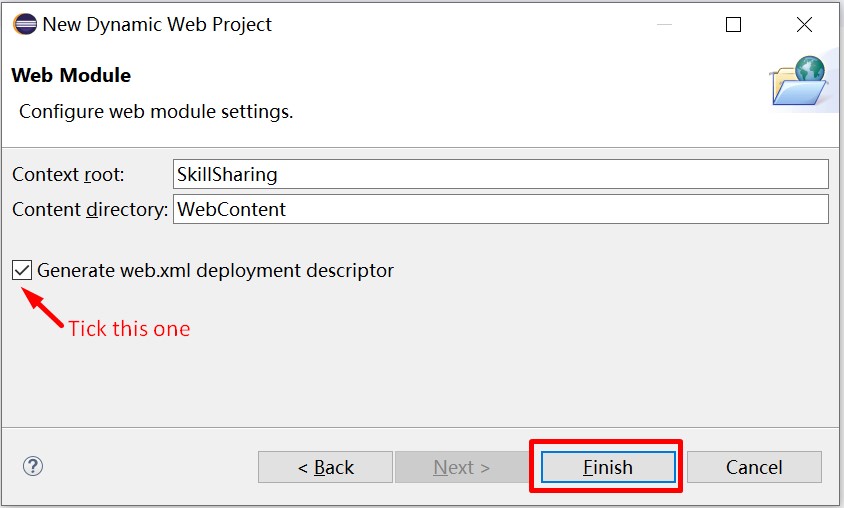
Now Click on Finish. A new window will open and you can see in the left panel i.e. Project Explorer, your project name SkillSharing has been created as shown in Figure below.
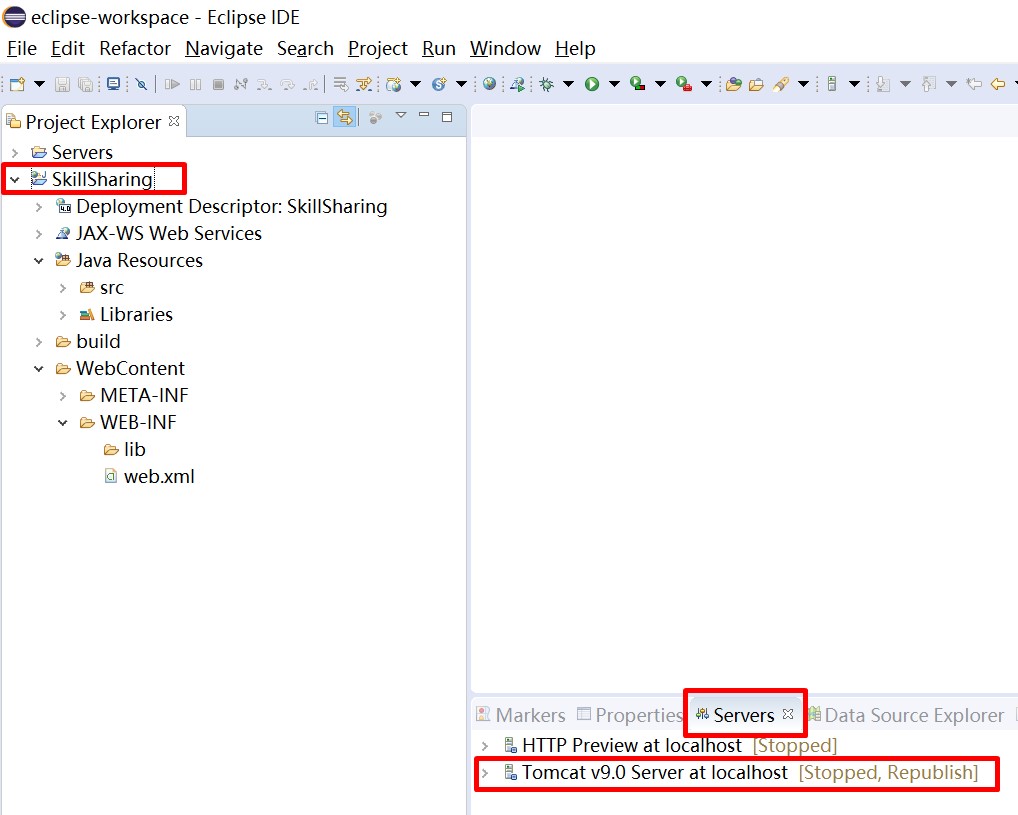
Now, your first web application project is created, and after this create a new java package.
Step-2 [Optional]: Create a New Java Package for Servlet Class
Creating a new java package is good practice because it works like a container for all servlet classes. This step is optional.
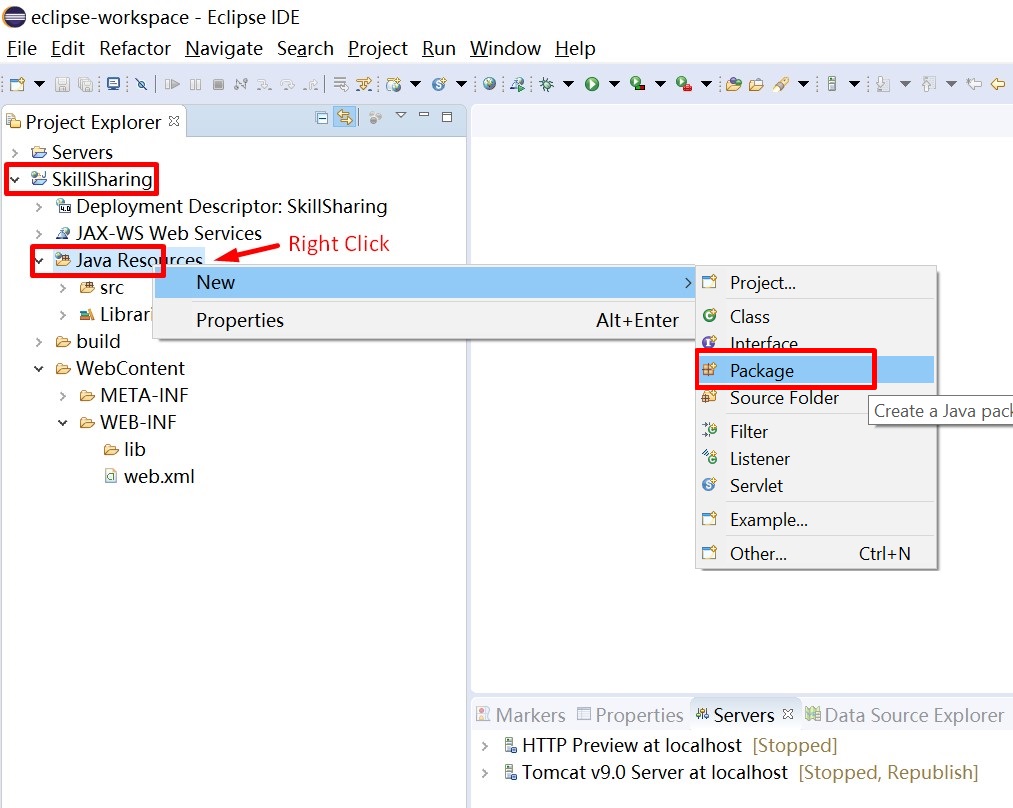
Right-click on Java Resources -> New -> Package as shown in Figure below.
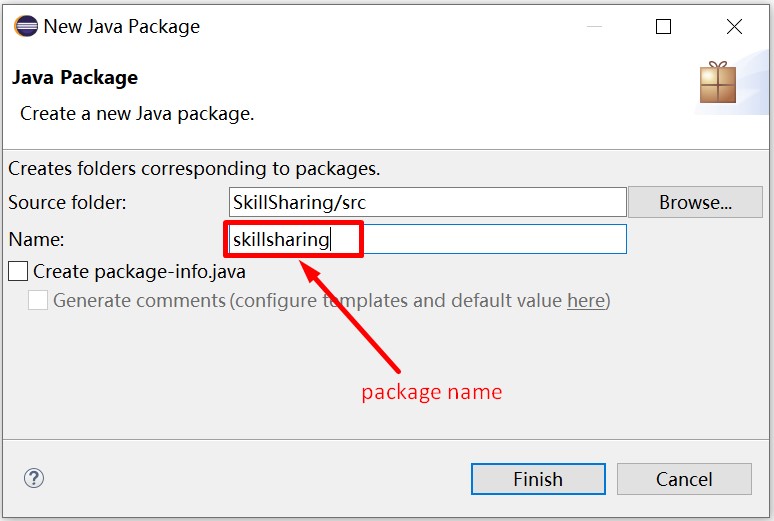
Click on Package, a new window will open, write the package name as skillsharing as shown in the figure below.
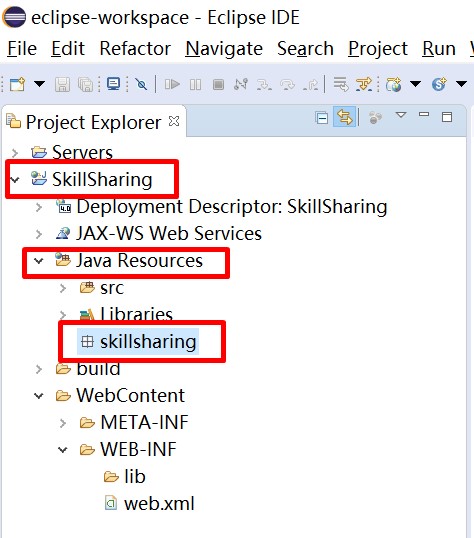
Click on the Finish button, your package is created in eclipse project explorer as shown in the figure below.
Now, your package is created inside the servlet project. Let us create a new servlet class inside a package skillsharing.
Step-3: Creating a New Servlet Class
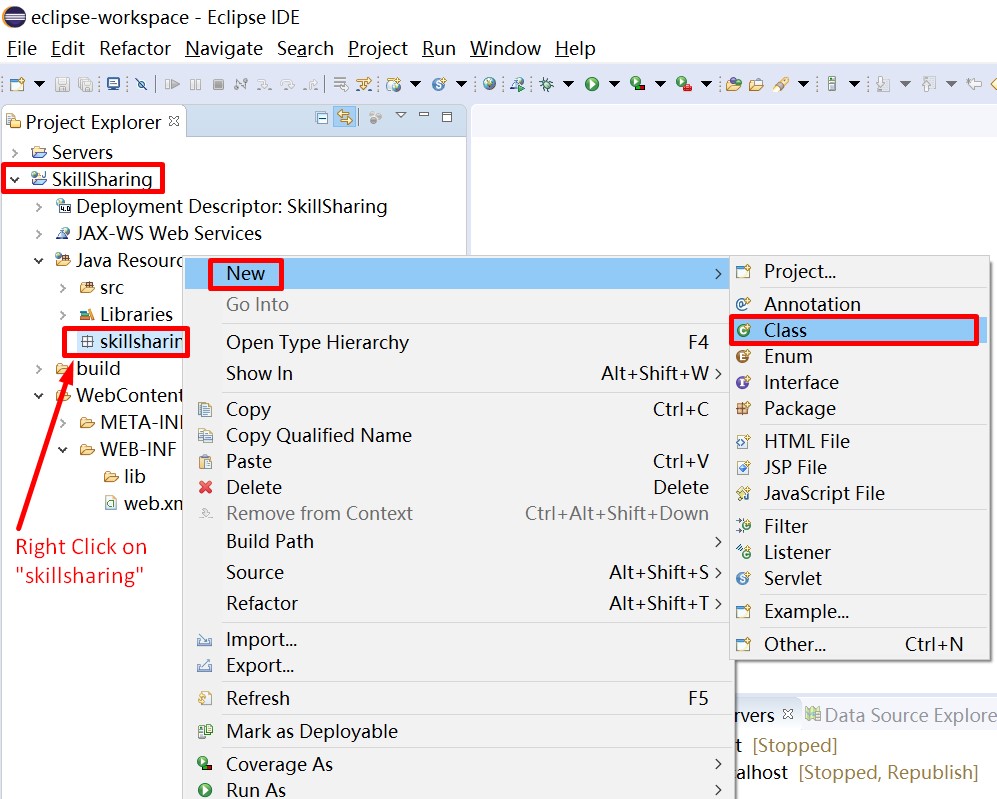
For creating a new servlet class, right-click on package name skillsharing and go to path skillsharing -> New -> Class as shown in Figure below.
Now, select Class, and write any servlet class name. E.g. For this tutorial, I am using HelloWorld as a class name.
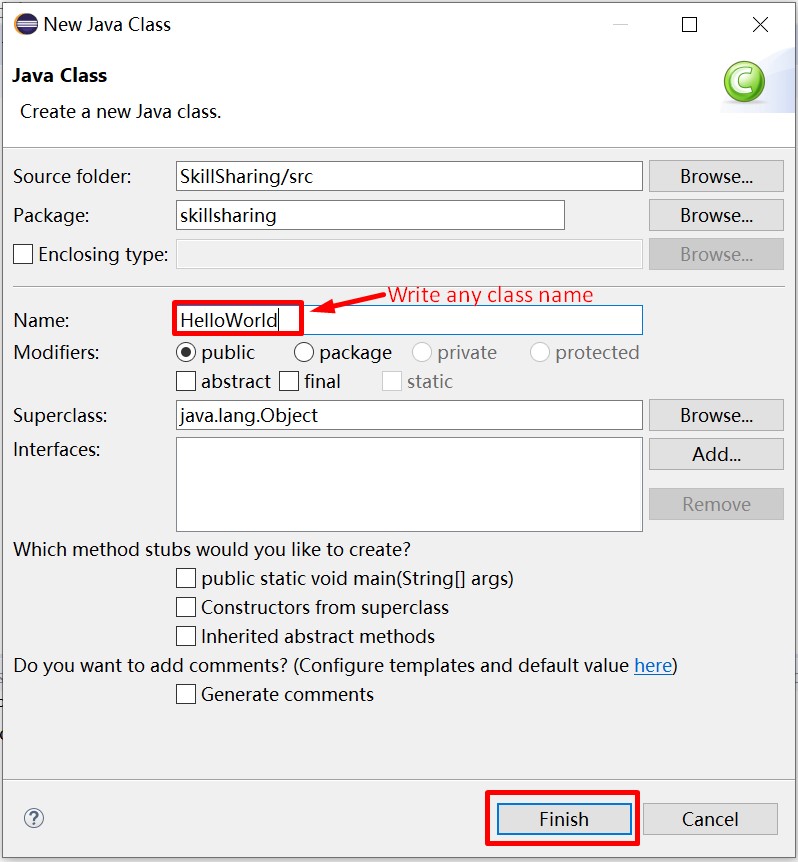
Click on Finish, the HelloWorld servlet class is created in the java package skillsharing as shown in the figure below.
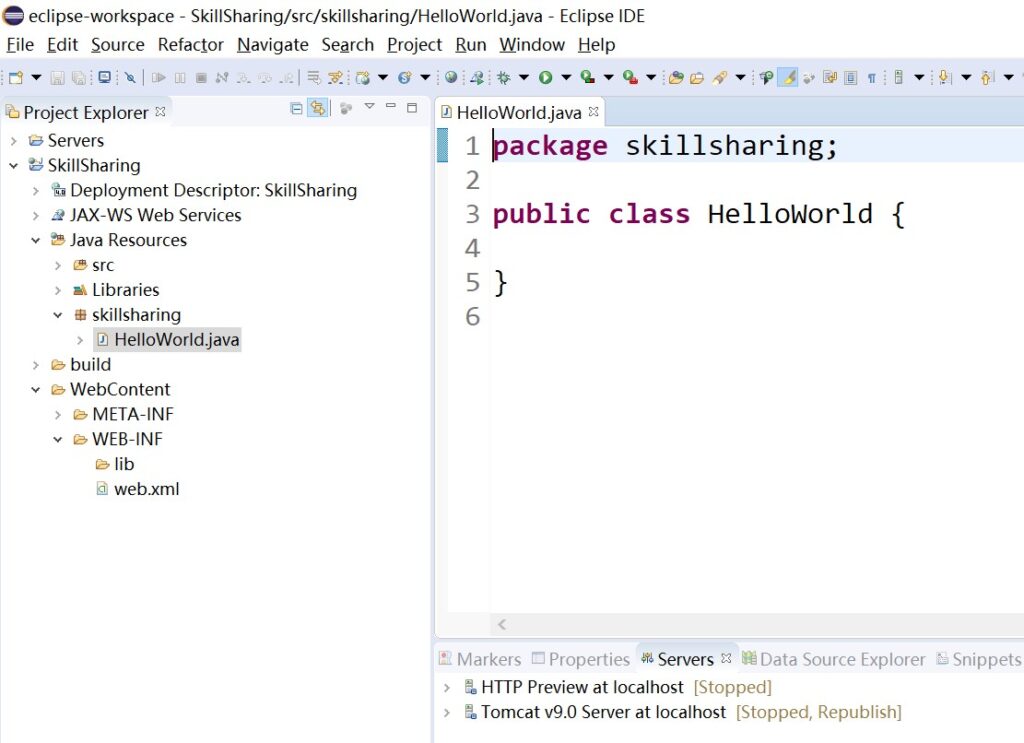
Now, All Set.
Step-4: Example
In this example, we have created a servlet class HelloWorld that inherits the GenericServlet class of javax.servlet package.
//Program to print "Hello World"
package skillsharing;
import java.io. *;
import javax.servlet.*;
public class HelloWorld extends GenericServlet {
public void service(ServletRequest request, ServletResponse response)
throws ServletException, IOException
{
response.setContentType("text/html");
PrintWriter pw = response.getWriter();
pw.println("Hello World");
}
}
Step-4.1: Copy the above servlet program and paste in Eclipse as shown in the figure below
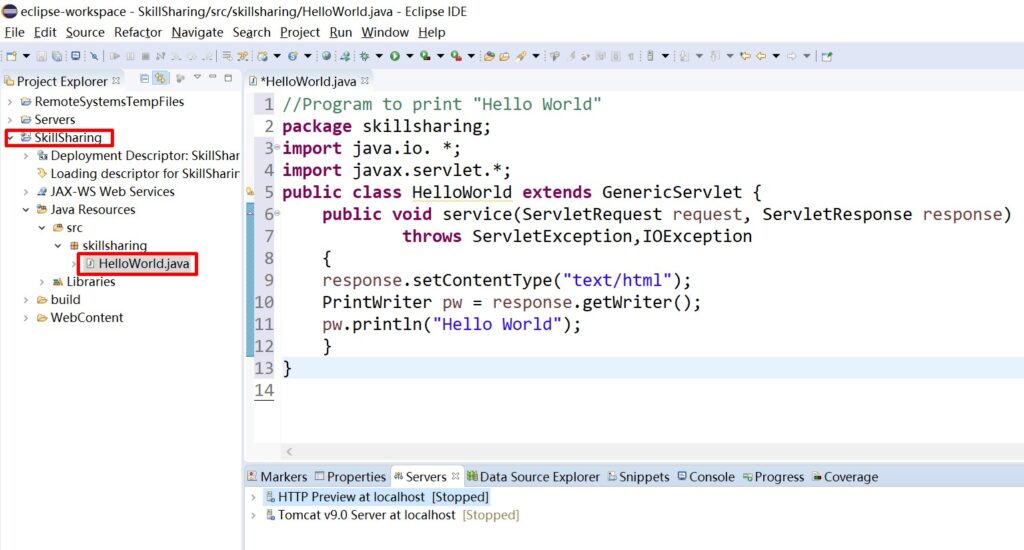
Step-4.2: Configuring a Servlet Class for Deployment in web.xml file.
Go to (Project Name) SkillSharing -> WebContent -> WEB-INF -> web.xml, and edit web.xml as shown in figure below.
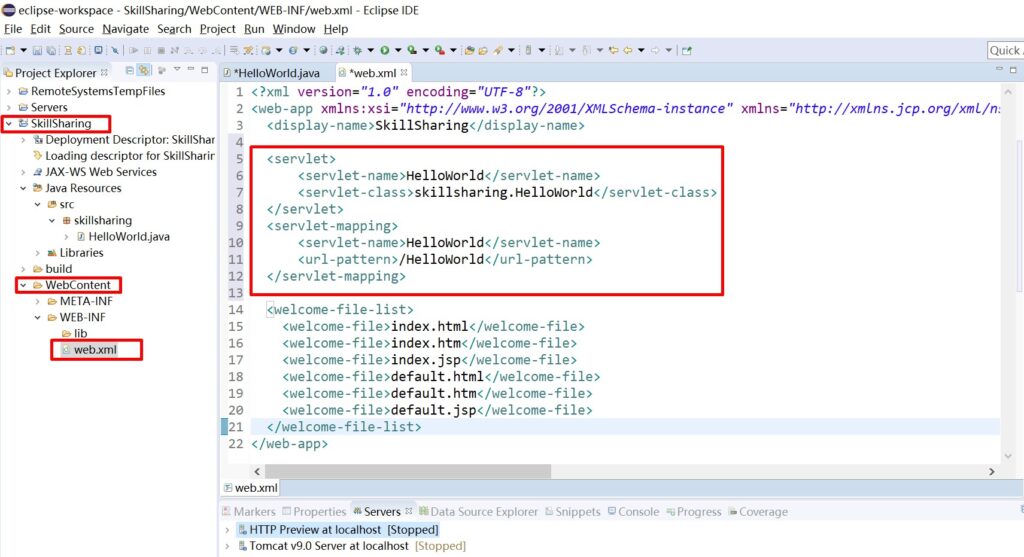
Copy the below code and paste in web.xml file inside <web-app>
<servlet>
<servlet-name>HelloWorld</servlet-name>
<servlet-class>skillsharing.HelloWorld</servlet-class>
</servlet>
<servlet-mapping>
<servlet-name>HelloWorld</servlet-name>
<url-pattern>/HelloWorld</url-pattern>
</servlet-mapping>
Now save the web.xml file.
Step-4.3: Run the Servlet Class
Right-click on Servlet class HelloWorld and Run as -> Run on Server, as shown in the Figure below
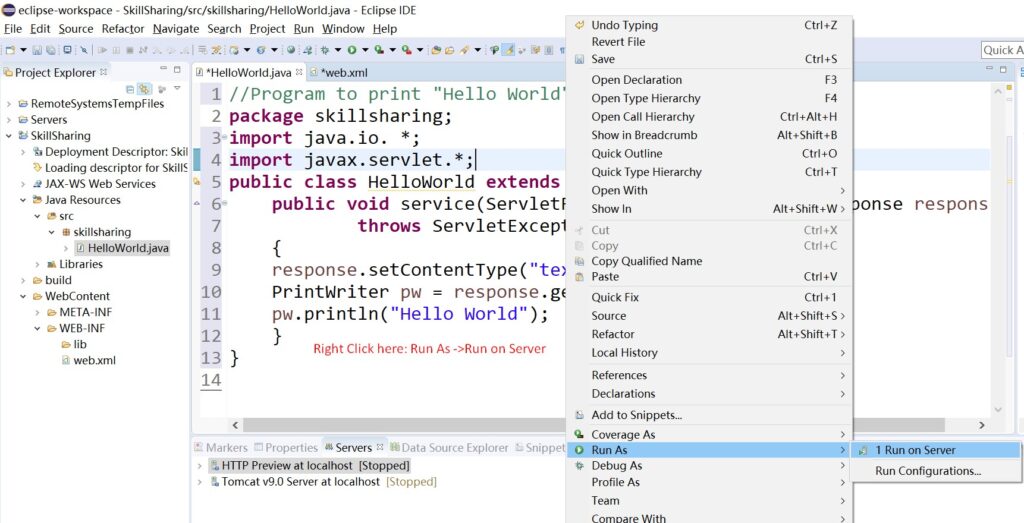
Then Click on Run on Server, a new window will open as shown in Figure below.
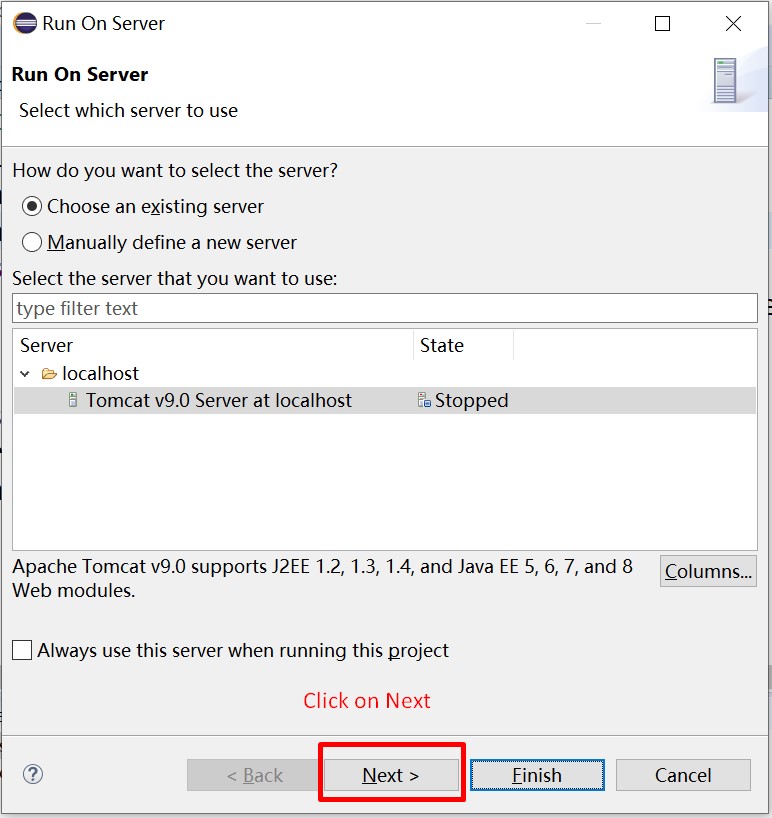
Now, Click on Next, a new window will open as shown in the Figure.
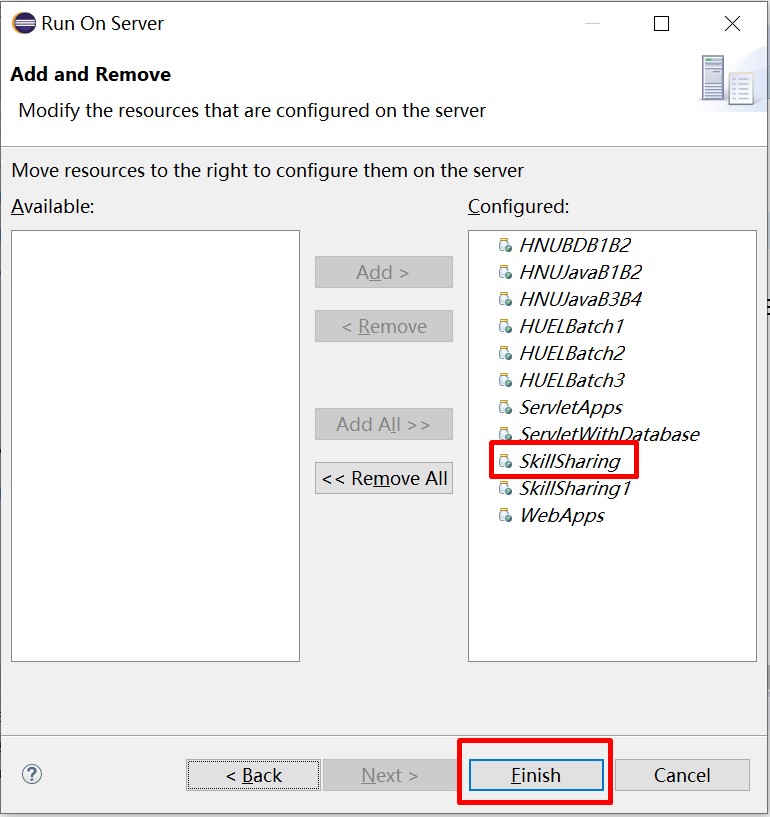
Select your project skillsharing and click on the Finish button.
After clicking on Finish, the output is shown in Figure as below. The URL used to access the HelloWorld servlet class is http://localhost:8080/skillsharing/HelloWorld

Explanation: First Servlet Program
package skillsharing;
It is a simple package name for the Servlet class.
import java.io.*;
java.io package is needed for PrintWriter, IOException, and I/O operations.
import javax.servlet.*;
This package contains the classes and interfaces required to build servlets. You will learn more about these later in this tutorial.
public class HelloWorld extends GenericServlet
Next, the program defines HelloWorld as a subclass of GenericServlet. To write a servlet, it is required to extend the abstract class GenericServlet, like Applet is required to extend to write an Applet.
A GenericServlet class is defined in javax.servlet package and is a protocol-independent Servlet that means it can handle any type of request (Generic, HTTP) and it always overrides the service() method to handle the client request/response.
public void service (ServletRequest request, ServletResponse response) throws ServletException, IOException
Inside HelloServlet, the service( ) method (which is inherited from GenericServlet) is overridden. This method handles client requests using the object of ServletRequest interface that is defined as a first argument in service( ) method. The second argument is a ServletResponse object that enables the servlet to formulate a response for the client.
The service() method throws two checked exceptions i.e. javax.servlet.ServletException and java.io.IOException.
response.setContentType(“text/html”);
The setContentType(String str) method is defined in the ServletResponse interface and takes a string parameter and does not return anything (returns void).
setContentType() method establishes the MIME(Multipurpose Internet Mail Extension) type of the HTTP response. The data that can be sent may be simple plain text, HTML form, XML form, image form of type gif or jpg, excel sheet, etc.
In this program, the MIME-type is “text/html”. This indicates that the browser should interpret the content as HTML source code.
Example:
response.setContentType(“text/html”);
In “text/html”, “text” is known as type and “html” known as subtype. A type contains many subtypes.
List of Content Types
- text/html
- text/plain
- application/msword
- application/vnd.ms-excel etc.
PrintWriter pw = response.getWriter();
Next, getWriter() method defined in ServletResponse interface and return an object of PrintWriter. Anything written to this stream is sent to the client as part of the HTTP response.
pw.println(“Hello World”);
Then println() is defined in PrintWriter class and is used to write some simple HTML text as the HTTP response. This string message (here, “Hello, World”) is ultimately sent to the client as a response by the ServletResponse.
