Blog
How to Install Eclipse IDE and Configure Apache Tomcat Server to write Servlet Applications?
- February 12, 2022
- Posted by: jcodebook
- Category: Servlet Tutorials
This tutorial guides you about the downloading and installation of Eclipse IDE and Apache Tomcat Server to develop Java Enterprise Web Applications (like Servlet & JSP) for Windows, Linux, and Mac OS.
To write Servlet Web Applications we need the following software
- Eclipse IDE https://www.eclipse.org/downloads/
- Apache Tomcat Server https://tomcat.apache.org/download-90.cgi
In this tutorial, we will cover the following topics
- Downloading and Installation of Eclipse IDE
- Downloading, Installing of Apache Tomcat Server
- Configuring Apache Tomcat Server in Eclipse IDE
Downloading and Installation of Eclipse IDE
Eclipse (https://www.eclipse.org/downloads) is an open-source Integrated Development Environment (IDE) supported by IBM. Eclipse is popular for Java application development (Java SE and Java EE) and Android apps. It also supports C/C++, PHP, Python, Perl, and other web project developments via extensible plug-ins. Eclipse is cross-platform and runs under Windows, Linux, and macOS.
Note: An x64 platform only supports configurations for x64(Only 64 bit OS), while x86-64 offered support for both the x64 architecture and the x86 architecture.
How to Download and Install Eclipse IDE
Use the link https://www.eclipse.org/downloads/ to download the Eclipse IDE. There are two ways to install Eclipse IDE.
- Using the Eclipse Installer and
- Using the Eclipse Downloaded Package
You can use any of the approaches to Install Eclipse IDE. Let’s learn both methods one by one.
1. Using Eclipse Installer
First, we will download the Installer then install Eclipse IDE.
Step 1.1 Download Eclipse Installer
Use the link https://www.eclipse.org/downloads/packages/installer to download Eclipse Installer. The following figure shows the steps to download Eclipse Installer.
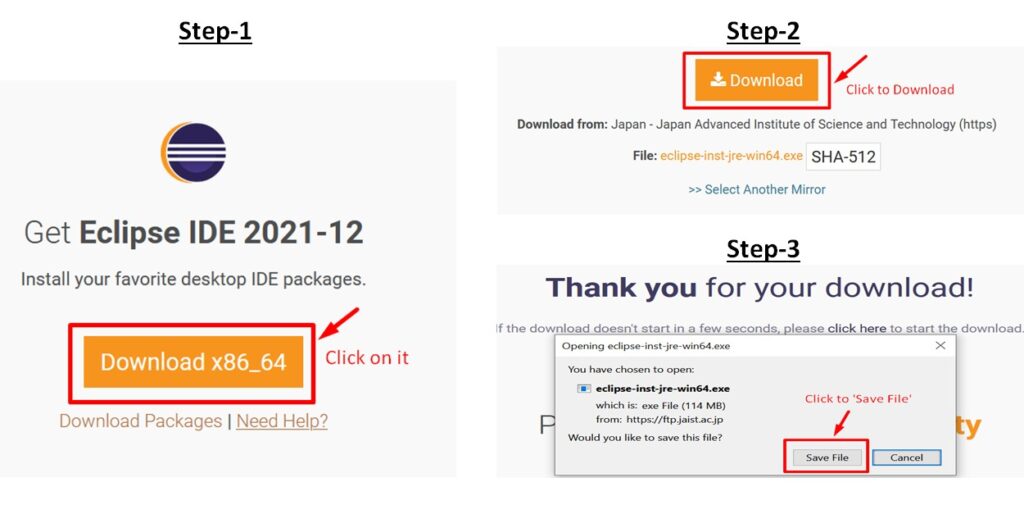
Step 1.2: Install Eclipse IDE using Eclipse Installer
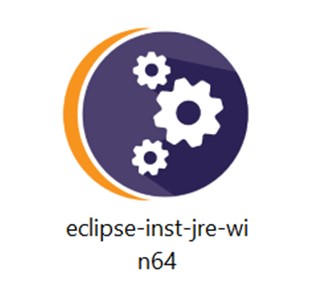
Double click on the Eclipse Installer file and follow the installation steps. The following figure shows the Eclipse Installer File.
For more help, use this link https://www.eclipse.org/downloads/packages/installer
2. Using Eclipse Downloaded Package
First, we will download the package file then install Eclipse IDE.
Step 2.1: Download Eclipse IDE Package
You can use the link https://www.eclipse.org/downloads/packages/ to download Eclipse packages. Eclipse package 2021‑12 R now includes a JRE for macOS, Windows, and Linux operating systems.
The following figure shows the steps to download Eclipse Package for different OS.

Now run the Eclipse Package File and follow the installation steps and Launch the Eclipse.
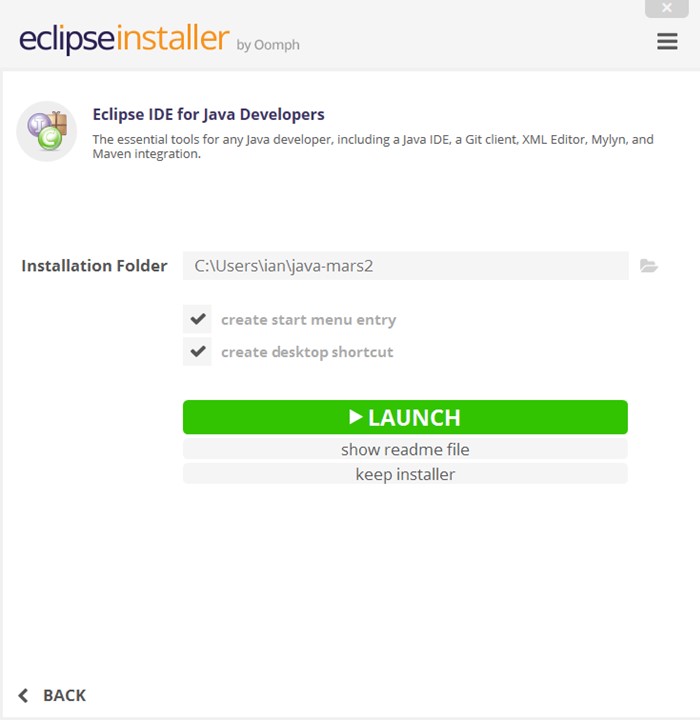
The following figure shows the Eclipse IDE has been successfully installed on your computer.

Now, to write and run servlet programs we need at least one web server. Here, we are using Apache Tomcat Server. So, let’s learn how to download Apache Tomcat Server and configure it to Eclipse IDE.
Downloading, Installing, and Configuring Apache Tomcat Server in Eclipse IDE
The Apache Tomcat® (http://tomcat.apache.org/index.html) software is an open-source implementation of the Java Servlet, Java Server Pages, Java Expression Language, and Java Web Socket technologies.
Please follow the following steps to download and configure Apache Tomcat Server.
Step-1: Downloading Apache Tomcat Server
Go to the link https://tomcat.apache.org/download-90.cgi to download Apache Tomcat. You can download 32 bit or 64 bit Apache Tomcat depending on your OS architecture.
So, here, we are downloading the Tomcat 9 server for 64 bit OS architecture as shown below.

For Windows users, after the Tomcat 9 has finished downloading it should be available in your download directory as shown below.
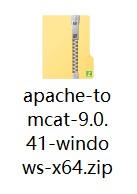
Now, after downloading Apache, Extract the downloaded zipped folder to any desired location on your computer.
Step-2: Configuring Apache Tomcat Server in Eclipse IDE
We have several methods to configure Apache Tomcat in Eclipse IDE. One of them is explained in this tutorial
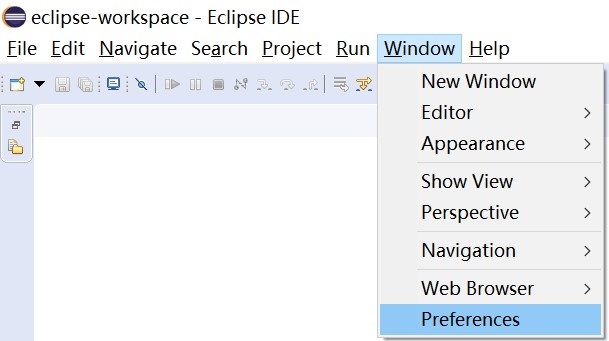
Open Eclipse IDE and go to the path Eclipse -> Windows -> Preferences as shown below
Now go to Preferences -> Server -> Runtime Environment -> Add as shown below.
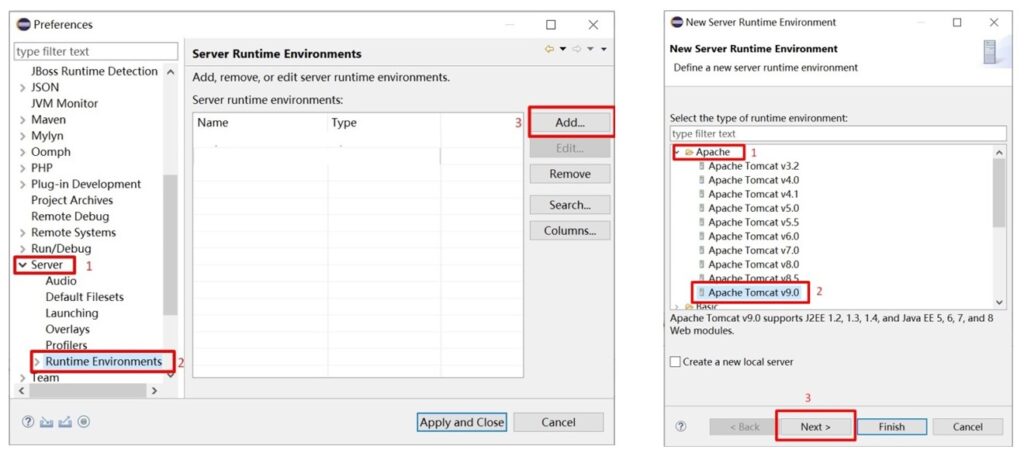
Click on Next and a new window will open as shown in the image below.

Now, click on Finish, and Apache Tomcat 9 is added in Eclipse IDE as shown in the figure below

Now, click on Apply and Close. In Eclipse IDE, click on the Servers tab located at the bottom and you have successfully configured the tomcat server in Eclipse IDE as shown in the figure below.

Congratulation!! You have successfully configured the Apache Tomcat Server 9 in Eclipse IDE.
You can now write and run Servlet or JSP programs in Eclipse IDE.
