Course:
Learn Java Programming
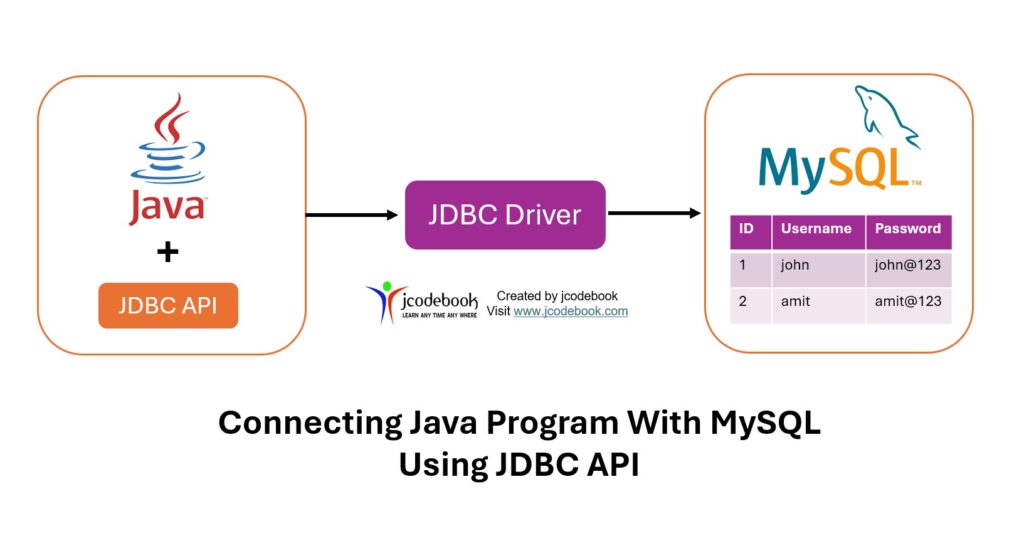
To connect a Java program with a MySQL database using the JDBC (Java Database Connectivity) API, follow these steps:
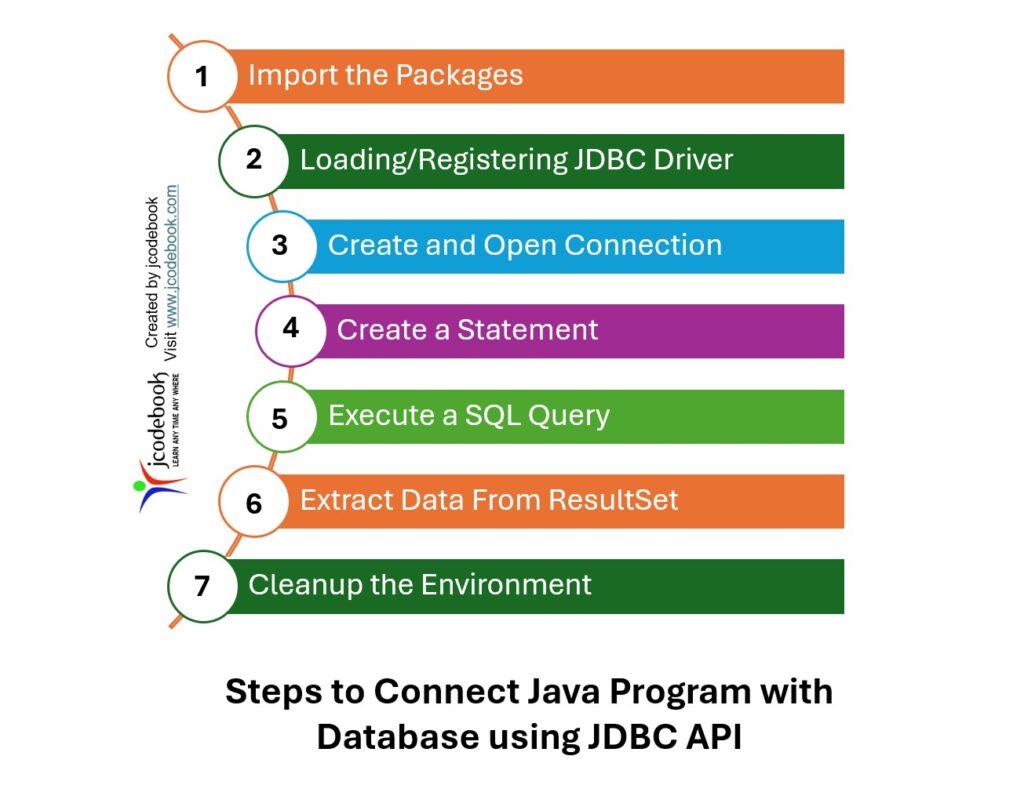
First, you need to import the necessary JDBC packages. All the JDBC APIs are defined in the java.sql package.
import java.sql.Connection;
import java.sql.DriverManager;
import java.sql.ResultSet;
import java.sql.SQLException;
import java.sql.Statement;
For MySQL, you need to load the MySQL JDBC driver. Ensure you have the MySQL JDBC driver (mysql-connector-java.jar) in your classpath.
The forName() method of the java.lang.Class class loads the JDBC driver and registers the driver with the following syntax.
try {
    Class.forName("com.mysql.cj.jdbc.Driver");
} catch (ClassNotFoundException e) {
    e.printStackTrace();
}
Create a connection to the database using the DriverManager class.
The DriverManager class provides the getConnection() method to create a Connection object.
String url = "jdbc:mysql://localhost:3306/yourDatabaseName";
String username = "yourUsername";
String password = "yourPassword";

Connection connection = null;

try {
	connection = DriverManager.getConnection(
			url, username, password);
	System.out.println("Connection established successfully.");
} catch (SQLException e) {
	e.printStackTrace();
}
DriverManager.getConnection(String url, String user, String password): Attempts to establish a connection to the given database URL.
Create a Statement object to send SQL statements to the database. There are three types of statements: Statement, PreparedStatement, and CallableStatement.
Statement statement = null;

try {
    statement = connection.createStatement();
} catch (SQLException e) {
    e.printStackTrace();
}
Connection.createStatement(): Creates a Statement object for sending SQL statements to the database.
Execute an SQL query using the Statement object. You can execute queries that return a ResultSet object or update statements.
String query = "SELECT * FROM yourTableName";
ResultSet resultSet = null;

try {
    resultSet = statement.executeQuery(query);
} catch (SQLException e) {
    e.printStackTrace();
}
Statement.executeQuery(String sql): Executes the given SQL statement, which returns a single ResultSet object.
Process the results returned by the query. The ResultSet object provides methods to navigate through and retrieve data from the result set.
try {
    while (resultSet.next()) {
        int id = resultSet.getInt("id");
        String name = resultSet.getString("name");
        System.out.println("ID: " + id + ", Name: " + name);
    }
} catch (SQLException e) {
    e.printStackTrace();
}
ResultSet.next(): Moves the cursor forward one row from its current position.ResultSet.getInt(String columnLabel): Retrieves the value of the designated column in the current row of this ResultSet object as an int.ResultSet.getString(String columnLabel): Retrieves the value of the designated column in the current row of this ResultSet object as a String.
Close the ResultSet, Statement, and Connection objects to free up database resources.
try {
    if (resultSet != null) resultSet.close();
    if (statement != null) statement.close();
    if (connection != null) connection.close();
    System.out.println("Connection closed successfully.");
} catch (SQLException e) {
    e.printStackTrace();
}
Install the following software
Open the MySql database and write the following Queries to create an Employee data table in the jcodebook database.
-- Creating a Database
create database jcodebook;

-- Enabling the Database for Use
use jcodebook;

-- Creating a Table
CREATE TABLE Employees (
    EmployeeID int PRIMARY KEY,
    Name varchar(255) NOT NULL,
    BirthDate date,
    Salary decimal(10, 2)
);

-- 1. INSERT
INSERT INTO Employees
(EmployeeID, Name, BirthDate, Salary)
VALUES (1, 'John', '1980-01-15', 60000);

-- Inserting Multiple Rows
INSERT INTO Employees
(EmployeeID, Name, BirthDate, Salary)
VALUES
(2, 'Jane', '1985-02-20', 65000),
(3, 'Michael', '1990-03-10', 55000);
Use the https://downloads.mysql.com/archives/c-j/ link to download the MySQL Java connector as shown below.
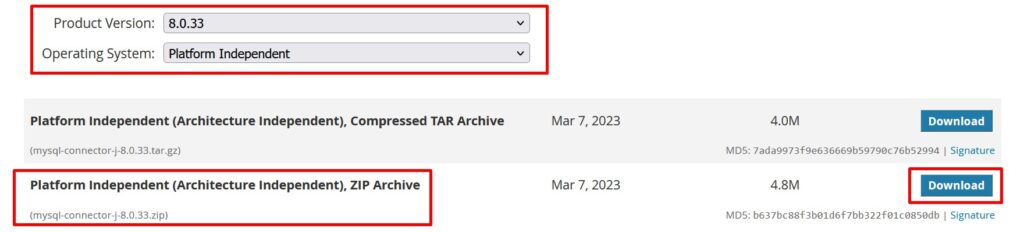
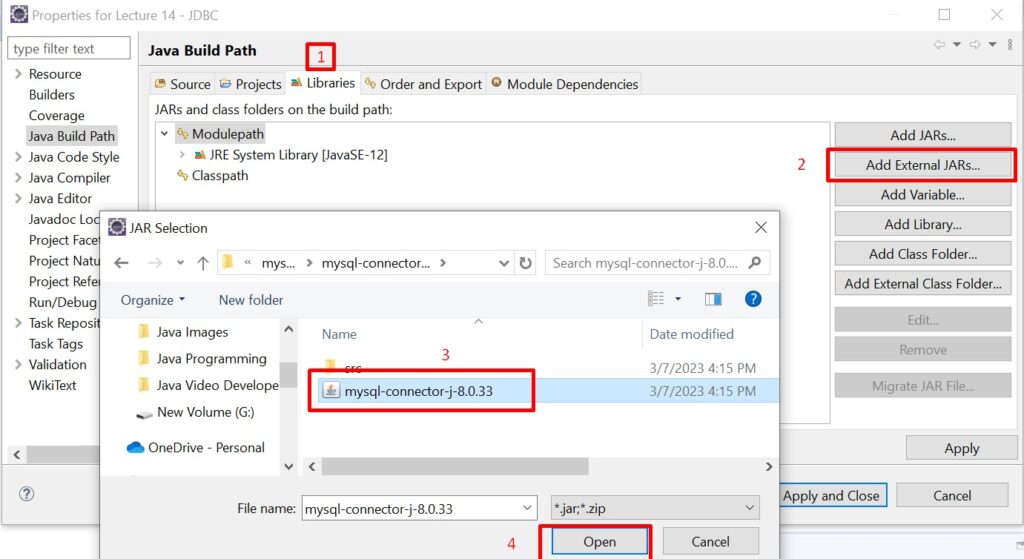
Extract the mysql-connector-j-8.0.33 file, copy the mysql-connector-j-8.0.33 jar file, and add it to your project.
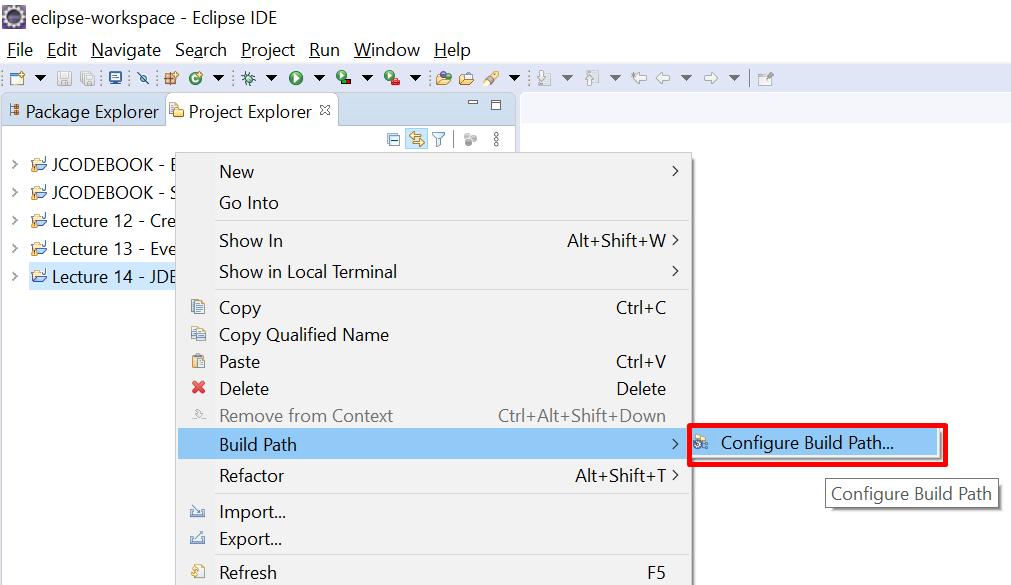
For example, your Java project name is ‘Lecture 14 – JDBC’.
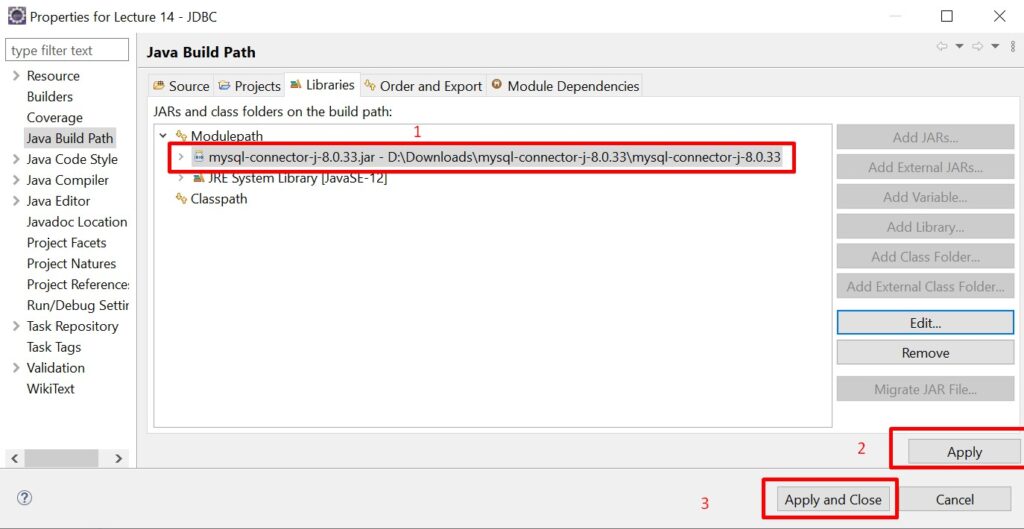
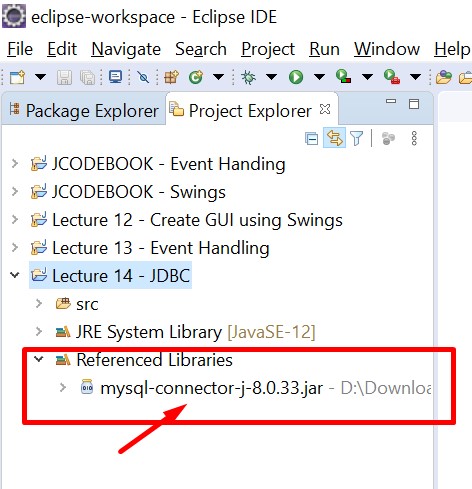
Add the mysql-connector-j-8.0.33 in the project build path as shown in the figure below.
package fetchdatafrommysql;

import java.sql.Connection;
import java.sql.Date;
import java.sql.DriverManager;
import java.sql.ResultSet;
import java.sql.Statement;

public class FetchDataFromMySQL {

	public static void main(String[] args) {
		String url = "jdbc:mysql://localhost:3306/jcodebook?serverTimezone=UTC";
		try {
			// Step 1: Import JDBC Packages (done above)

			// Step 2: Load and Register JDBC Driver
			Class.forName("com.mysql.cj.jdbc.Driver");
			// Step 3: Establish a Connection
			Connection con=DriverManager.getConnection(url, "root","root");
			// Step 4: Create a Statement
			Statement stmt = con.createStatement();
			// Step 5: Create and Execute a Query
			String sql="Select * from Employees";
			ResultSet rs=stmt.executeQuery(sql);
			System.out.println("EmpIDtFirstNametBirthDatetSalary");
			// Step 6: Process the Result Set
			while(rs.next()) {
				int empID = rs.getInt(1);
				String fname =  rs.getString(2);
				Date bdate = rs.getDate(3);
				double salary = rs.getDouble(4);

				System.out.println(empID+"t"+fname+"tt"+bdate+"t"+salary);
			}
			// Step 7: Close the Connection
			con.close();stmt.close();rs.close();
		}
		catch(Exception e) {
			System.out.println(e);
		}
	}
}
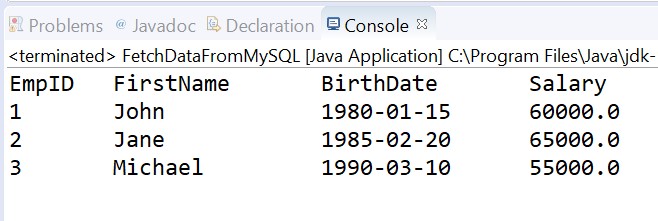
Output
You must be logged in to submit a review.